1. Getting Started
Installation and first login
System Requirements
| Item | Minimum | Recommended |
|---|---|---|
| OS | Android 6.0+ | Android 10+ |
| RAM | 2 GB | 4 GB |
| Storage | 100 MB free | 500 MB free (for data growth) |
| Internet | Only for activation | Not required after activation |
Installation Steps
-
1
Get the installer
Contact us to receive the Windows (.exe) or Mac (.dmg) installer.
-
2
Run the installer
Windows: Double-click the .exe file. If Windows SmartScreen appears, click "More info" → "Run anyway".
Mac: Open the .dmg file and drag CerebraQ to your Applications folder. -
3
Launch CerebraQ
Find "CerebraQ POS" in your Start Menu (Windows) or Applications (Mac) and open it.
-
4
Log in with default credentials
On first launch use: Username: admin / Password: admin. Change your password immediately after.
⚠️ Security: Change the default admin password immediately after first login via Users → Edit → Change Password.
First-Time Setup Checklist
Complete these steps before billing your first order
-
1️⃣
Configure Restaurant Info — Name, address, phone, GSTIN. (→ Settings)
-
2️⃣
Set GST rates — Enter your CGST % and SGST % in Billing Settings. (→ Settings)
-
3️⃣
Add your menu items — Manually or via Bulk Import. (→ Products)
-
4️⃣
Set up tables — If you have dine-in seating. (→ Tables)
-
5️⃣
Add staff accounts — Create cashier / manager logins. (→ Users)
-
6️⃣
Set up UPI QR (optional) — Enter your UPI ID to print QR on bills.
-
7️⃣
Configure Mobile Waiter App (optional) — Pick the preferred network adapter in Settings so waiters can take phone orders. (→ Mobile Waiter App)
💡 Tip: Run the Tutorial Mode first — it walks you through all steps with dummy data so you can practice without affecting real data.
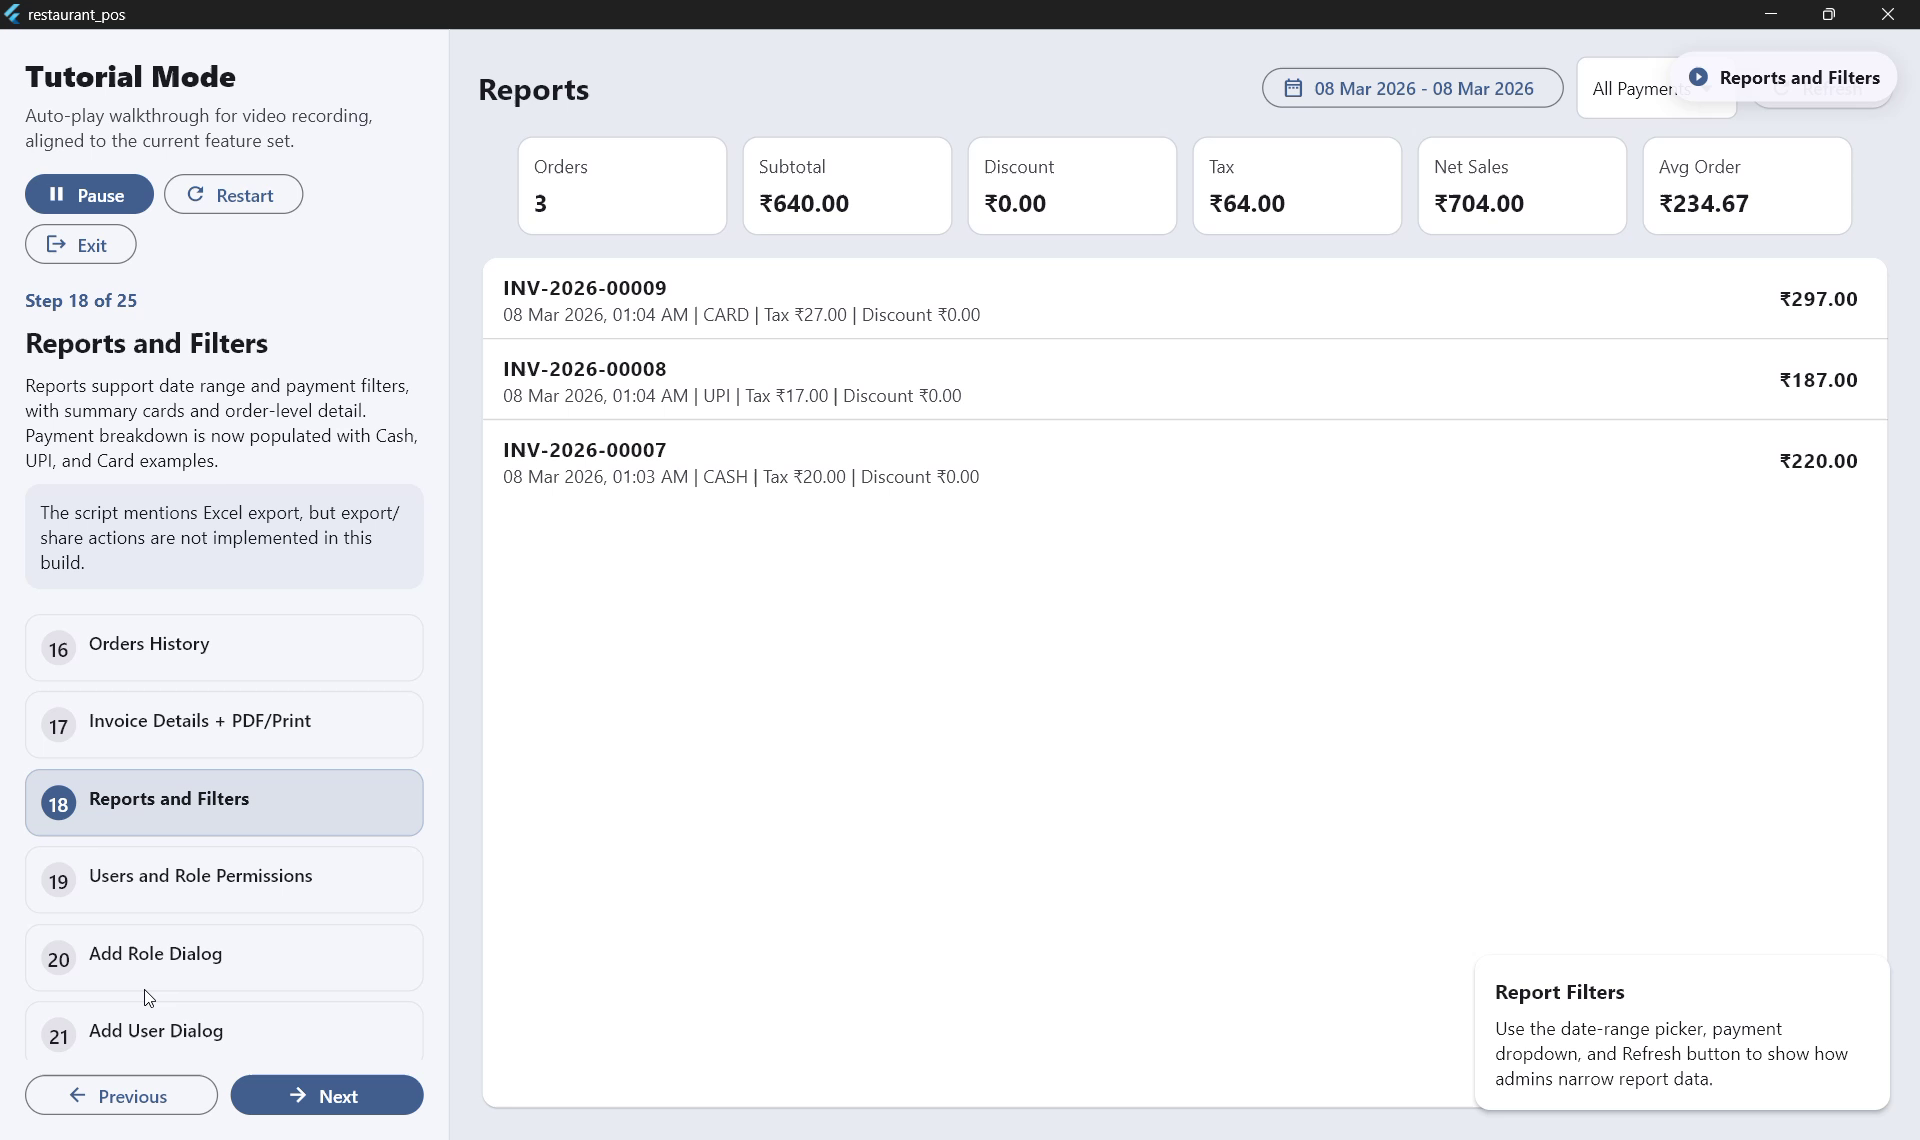
2. Tutorial Mode
Learn the system without affecting live data
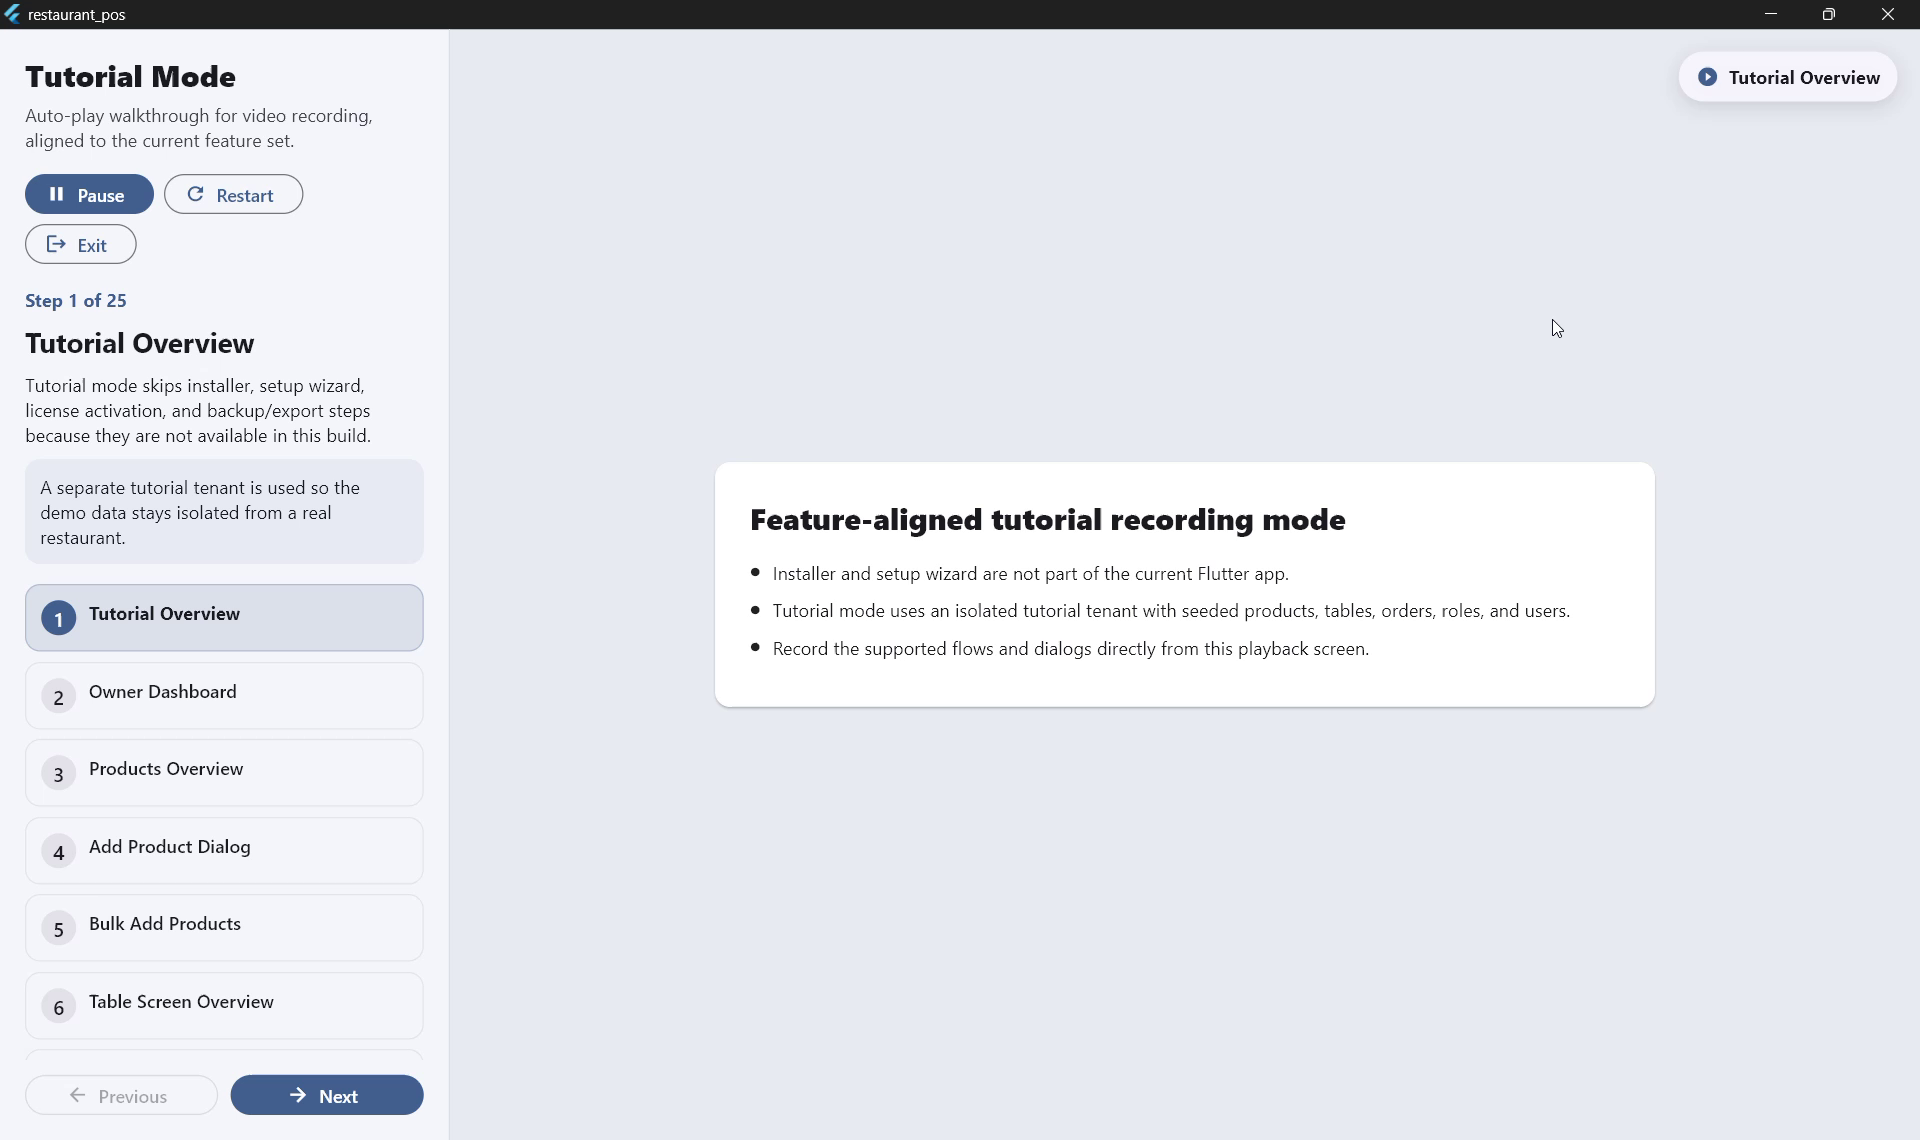
Tutorial Mode is a built-in 25-step interactive walkthrough that teaches you every feature using pre-loaded demo data. Nothing you do in Tutorial Mode affects your real restaurant data.
How to Start Tutorial Mode
-
1
Open CerebraQ POS and log in.
-
2
Click the "Tutorial" or "Help" button on the main dashboard.
-
3
Click "Start Tutorial". The system loads demo users, products, tables, and orders.
-
4
Follow the on-screen prompts. Use Next / Back to navigate, or Jump to Step to skip ahead.
Tutorial Controls
▶ Auto-Play
Runs the tutorial automatically — ideal for demos or staff presentations.
⏸ Pause
Pause at any step to explore the screen on your own.
↩ Restart
Restart from Step 1 with fresh demo data at any time.
🔢 Jump to Step
Skip directly to any of the 25 steps without going through all previous ones.
✅ Great for: Training new staff, product demos to management, and onboarding without risk to live data.
3. Settings & Configuration
Configure your restaurant details and billing rules
Go to Settings from the main menu. Only Owner / Admin roles can access this screen.
Restaurant Information
| Field | Description |
|---|---|
| Restaurant Name | Appears on all printed bills and receipts |
| Address | Full address printed on invoices |
| Phone Number | Contact number shown on bills |
| GSTIN | Your GST registration number (for tax compliance) |
| UPI ID | Used to generate a QR code on printed bills for UPI payment |
| Dark Mode | Toggle dark theme for low-light environments |
Billing Settings
| Field | Description |
|---|---|
| Invoice Prefix | e.g. "INV" → invoices become INV-001, INV-002… |
| CGST % | Central GST rate (e.g. 2.5 for 5% total GST split equally) |
| SGST % | State GST rate (typically same as CGST) |
| Round Off | Rounds total to nearest ₹1 (reduces change-handling) |
💡 Common GST rates for restaurants: 5% GST (no ITC) = CGST 2.5% + SGST 2.5%. AC restaurants: 18% = CGST 9% + SGST 9%.
Waiter Mobile App Settings
These settings control the built-in web server that lets waiters take orders from their phones. See Section 8 for the full mobile app guide.
| Setting | Description |
|---|---|
| Preferred Network Adapter | Choose which network adapter (WiFi or Ethernet) the waiter app URL is advertised on. The chosen adapter's URL is shown with a ★ in the sidebar. Choose "Show all adapters" if you want both displayed. |
✅ Tip: If your counter PC is connected to both WiFi and Ethernet, pick the adapter that is on the same network as the waiters' phones. Usually this is the WiFi adapter.
4. Products & Menu
Add and manage your menu items
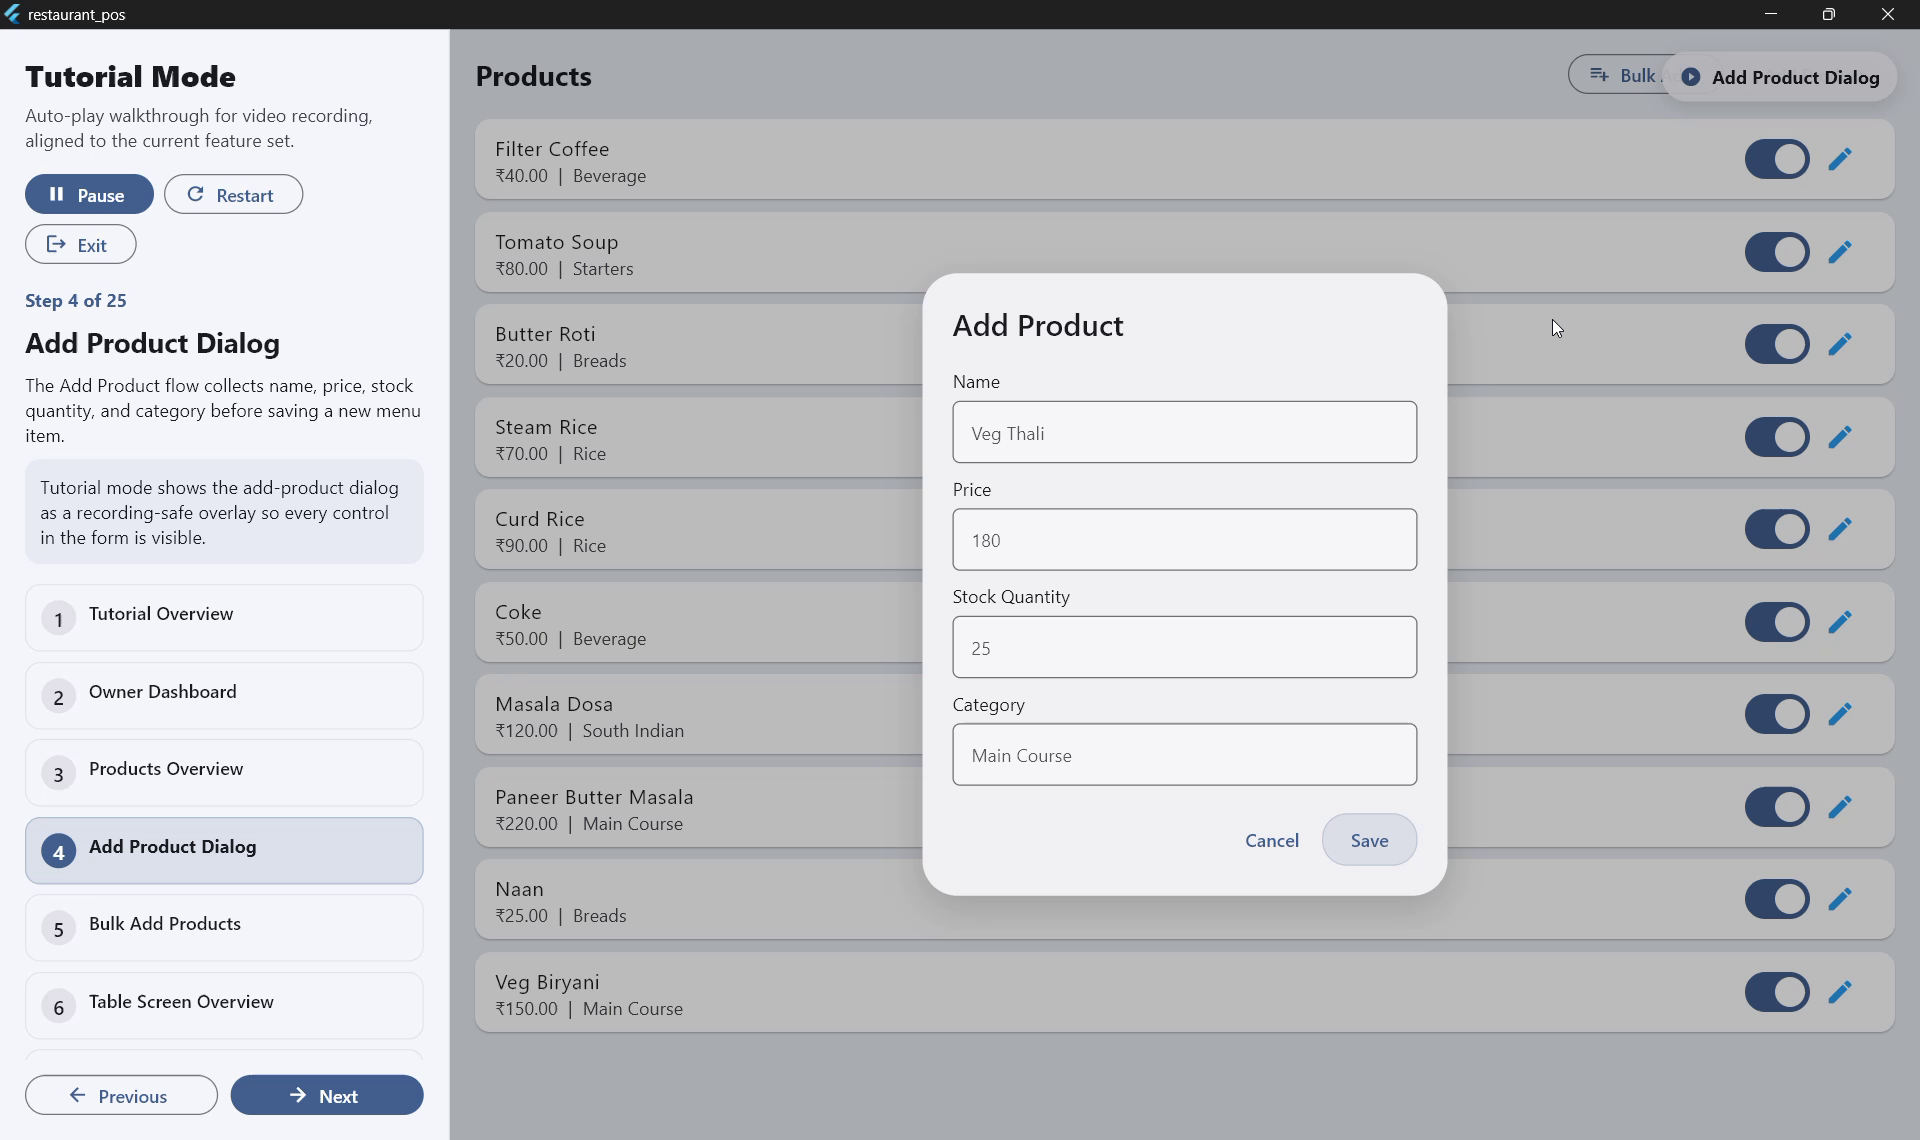
Adding a Single Product
-
1
Go to Products from the main menu.
-
2
Click "Add Product" (top-right button).
-
3
Fill in: Name (required), Price (required), Category (optional), Stock (optional).
-
4
Click "Save". The product now appears in the POS product grid.
Editing or Deactivating a Product
- •In the Products list, click the Edit (pencil) icon next to a product to change name, price, or category.
- •Toggle the Active/Inactive switch to hide an item from the POS without deleting it (useful for seasonal items).
Bulk Menu Import
Add 100+ items in minutes
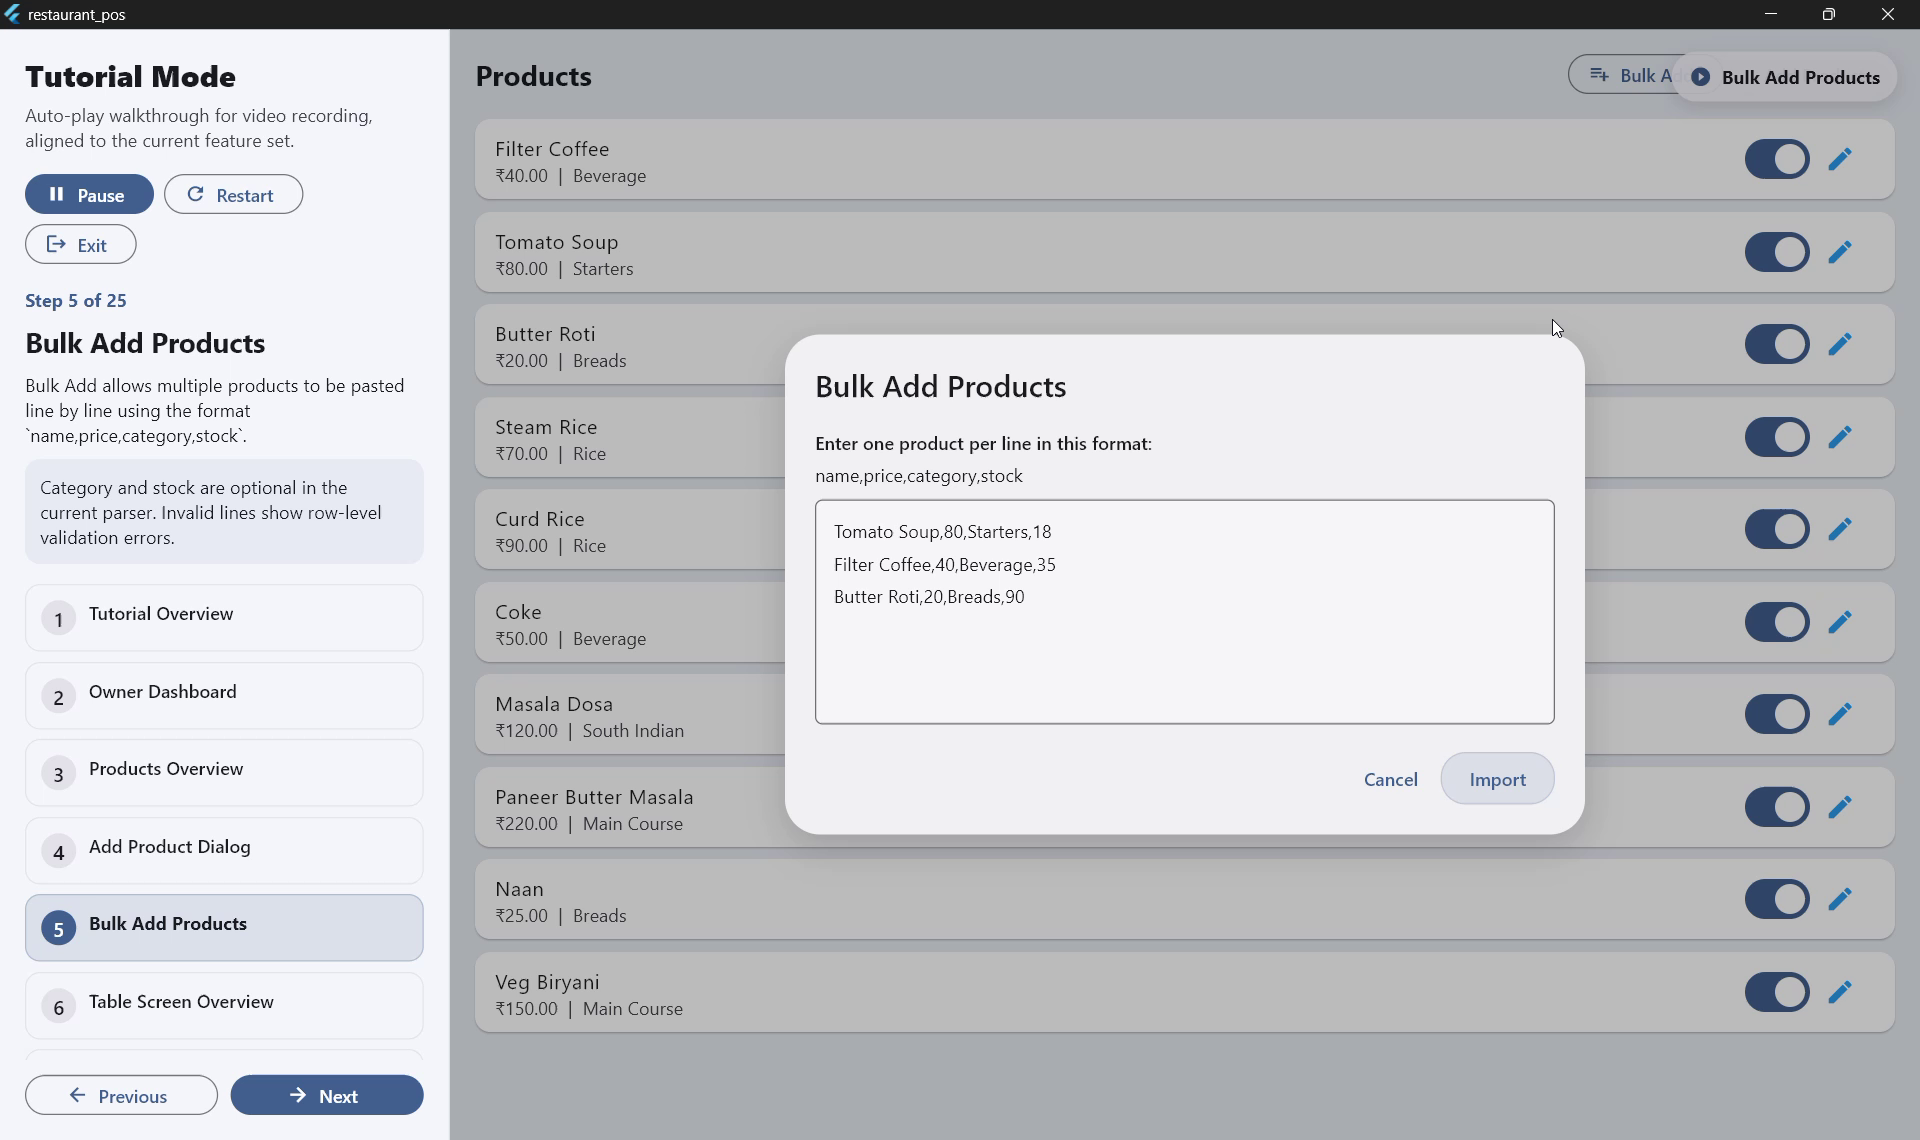
Use Bulk Import to add your entire menu at once from a spreadsheet. Perfect for new setups or adding seasonal menus.
How to Bulk Import
-
1
Prepare your data in Excel or Google Sheets
Use 4 columns: Name, Price, Category, Stock (Category and Stock are optional).
-
2
Copy the rows
Select your data rows in Excel/Sheets and press Ctrl+C to copy.
-
3
Open Bulk Import
In CerebraQ, go to Products → Bulk Import and paste your data into the text box.
-
4
Review and import
The system validates each line. Errors are highlighted. Fix any issues, then click "Import".
Required Format (one item per line)
# Format: Name,Price,Category,Stock
Veg Biryani,150,Main Course,40
Butter Naan,25,Breads,80
Masala Dosa,120,South Indian,25
Filter Coffee,40,Beverage
Mineral Water,20
✅ Notes: Category and Stock are optional — you can leave them blank. Price must be a number. Items are added without replacing existing products.
5. Table Management
Set up and manage your dine-in tables
Adding Tables
-
1
Go to Tables from the main menu.
-
2
Click "Add Table". Enter a table name/number (e.g. "Table 1", "Window Seat") and capacity.
-
3
Click Save. Repeat for all your tables.
Table Status Colors
Green — Free
Table is available. Click to start a new order.
Orange — Occupied
Order in progress. Click to view/edit/bill.
💡 Tip: You can deactivate a table (e.g. a table under repair) without deleting it — it disappears from the POS view but keeps its history.
6. Takeaway Billing
Bill walk-in and takeaway customers
Taking a Takeaway Order
-
1
Open Takeaway POS
Click "Takeaway" or "New Order" from the main dashboard.
-
2
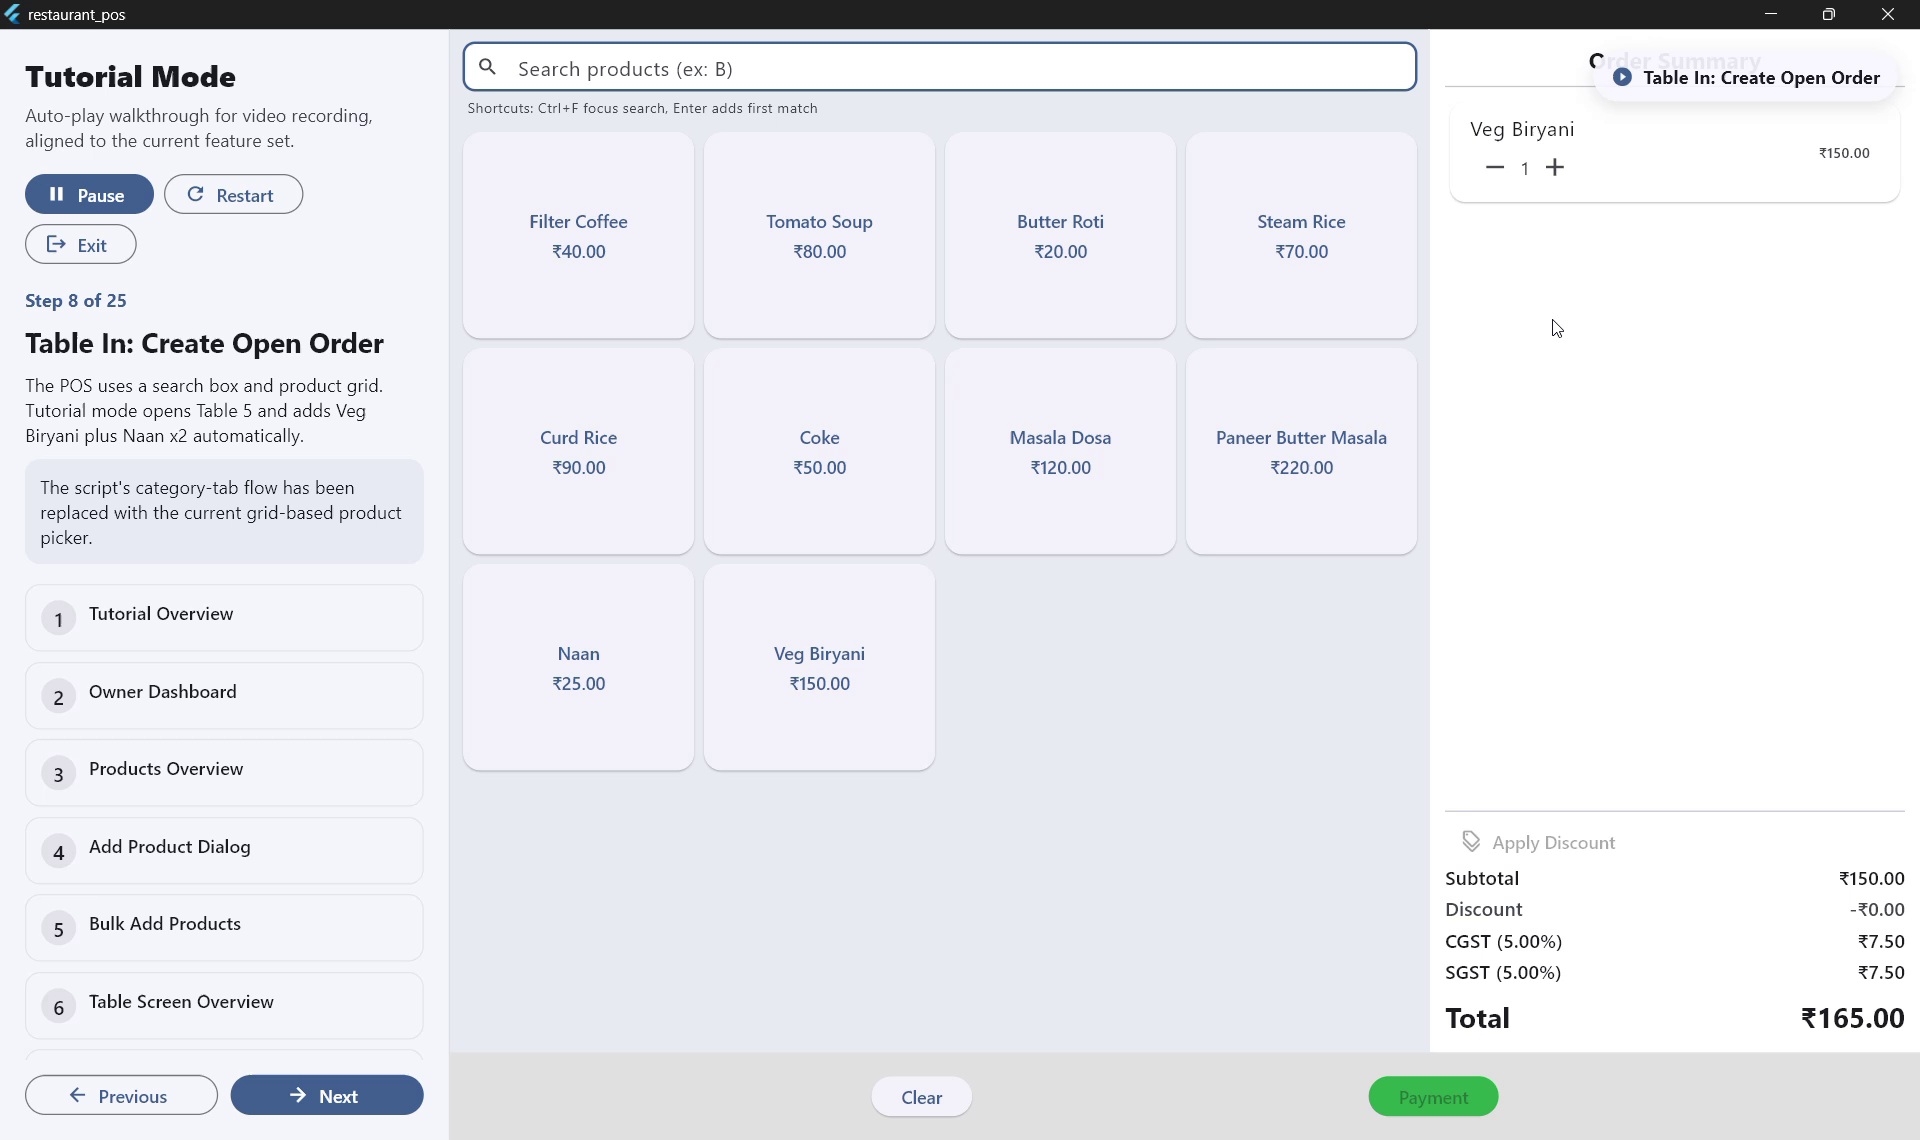
Add items
Option A — Search: Press Ctrl+F, type the item name, press Enter to add the top match.
Option B — Grid: Browse the product grid and click items to add them. -
3
Adjust quantities
Use the + / − buttons in the cart. To remove an item, reduce qty to 0 or click the trash icon.
-
4
Apply discount (optional)
Enter a flat amount (e.g. ₹20) or percentage (e.g. 10%) in the Discount field.
-
5
Select payment type
Choose Cash, UPI, or Card.
-
6
Complete the order
Click "Place Order". A PDF receipt (80mm) is generated automatically for printing.
✅ GST is calculated automatically based on the rates in Settings. The bill shows Subtotal, CGST, SGST, Discount, and Net Total.
7. Dine-In Billing
Table-linked orders for sit-down customers
Processing a Dine-In Order
-
1
Open the Tables screen
Click "Tables" from the main menu to see all tables and their statuses.
-
2
Select a free (green) table
Click the table. The Dine-In POS opens linked to that table. The table turns orange (Occupied).
-
3
Add items (same as Takeaway)
Search or use the product grid. Items are saved to this table automatically.
-
4
Add more items later (running order)
Return to Tables, click the occupied (orange) table, and add more items. Existing order is preserved.
-
5
Bill and complete
Click "Bill", select payment type, click "Place Order". The table automatically turns green (Free) after payment.
⚠️ Note: If a waiter name field is shown on your screen, entering the waiter name is optional. It appears on the printed receipt for tracking purposes.
Special Instructions / Order Notes
You can attach a short note to any individual item — for example "no onions", "extra spicy", or "half portion". Notes travel all the way from the POS cart to the Kitchen Order Ticket (KOT) and appear on the kitchen display below the item name.
Desktop POS
-
1
Add an item to the cart as normal.
-
2
Tap the note icon (pencil / 📝) next to the item in the cart.
-
3
Type the instruction in the dialog and tap Save. The note appears in italics below the item name in the cart.
Mobile Waiter App
- •Before sending: In the cart, tap "Add note" below any item to type a special instruction before tapping "Send to Kitchen".
- •After sending: In the existing order view, tap the pencil icon next to any item to edit its note. The KDS updates on the next refresh.
✅ Kitchen Display: Notes appear below the item name on the KDS screen as italicised amber text, so kitchen staff can see them at a glance without any extra step.
8. Mobile Waiter App
Let waiters take table orders from their phones — no app install needed
The CerebraQ Waiter App is a mobile web app built into the desktop POS. Waiters open it in their phone browser over WiFi — nothing to install. Orders appear on the desktop kitchen queue in real-time.
🌐
No App Install
Waiter opens a URL in their phone browser — works on any Android or iPhone.
⚡
Real-Time KOTs
Kitchen Order Tickets appear on the desktop instantly — same WiFi, no delay.
🔁
Multiple KOTs
Waiter can add more items and send a second KOT for the same table at any time.
Network Setup
-
1
Ensure same WiFi network
The counter PC and all waiter phones must be connected to the same WiFi router. The waiter app does not work over mobile data.
-
2
Find the waiter app URL
Look at the left sidebar in the CerebraQ desktop app. You will see a URL like
http://192.168.1.10:8080. If you set a preferred adapter (★), only that URL is shown prominently. -
3
Choose the right adapter (optional)
If the PC has both WiFi and Ethernet, go to Settings → Waiter Mobile App and select the adapter whose network the phones are on.
-
4
Share the URL with waiters
Waiters type the URL in their phone browser or scan a QR code you print and put on the counter. The URL does not change unless the PC gets a new IP address.
⚠️ Keep CerebraQ open: The waiter app server runs inside the CerebraQ desktop application. If the desktop app is closed or minimised to tray, the waiter app stops working until the desktop app is active again.
Waiter App — How to Take an Order
-
1
Open the URL on your phone
Type the URL shown on the desktop sidebar into your phone browser and tap Go.
-
2
Log in
Enter your CerebraQ username and password. The session stays active — you won't need to log in again on the same phone unless you log out.
-
3
Select a table
The Tables screen shows status colours: grey = free, amber = items added (not yet sent), green = KOT sent to kitchen.
-
4
Add items (with optional notes)
Browse menu categories and tap items to add them. Use + / − to adjust quantities. To add a special instruction (e.g. "no onions"), tap "Add note" below the item in your cart before sending. Tap the cart icon to review before sending.
-
5
Send to Kitchen (KOT)
Tap "Send to Kitchen". The desktop kitchen queue updates instantly. The button changes to "Send Next KOT" — you can still add more items for this table and send again.
-
6
Bill from the desktop POS
When the customer is ready to pay, the cashier at the counter opens the table in the desktop POS and clicks Bill as usual. GST is calculated and printed correctly.
Desktop Kitchen Queue
On the desktop, go to Orders to see the Kitchen Queue — all tables that have sent a KOT and are waiting for the kitchen.
Remove a single item
Click the ✕ next to any item in a kitchen entry to remove just that item without cancelling the whole order.
Cancel whole order
Click "Cancel Whole Order" to revert the kitchen status. The table goes back to editable and the waiter can resend a corrected KOT.
✅ Multiple KOTs per table: A waiter can send a KOT, then add more items and tap "Send Next KOT" — ideal when a table orders starters first and adds mains later. Each send triggers the kitchen queue on the desktop.
9. Reports & Analytics
Understand your sales performance
Reports are available to Owner / Admin roles only. Go to Reports from the main menu.
Dashboard Summary (Quick View)
Total Sales
Net revenue for selected period
Order Count
Total number of orders placed
Avg Bill
Average order value
Payment Mix
Cash / UPI / Card split
Top Items
Best-selling menu items
Peak Hours
Busiest times of day
Date Range Filters
- •Today — Current day's orders only
- •Last 7 Days — Weekly overview
- •Last 30 Days — Monthly summary
- •Custom Range — Pick any start and end date
Detailed Order Report
Scroll down in Reports for a complete order-by-order listing showing:
- ✓Invoice number and date/time
- ✓Items ordered with quantities
- ✓Subtotal, discount, tax, and net total
- ✓Payment type (Cash / UPI / Card)
- ✓Filter by payment type for reconciliation
By Waiter Report
Switch to the "By Waiter" tab in Reports to see a breakdown of sales grouped by the waiter name recorded on each order. This helps management track individual staff performance.
| Column | What it shows |
|---|---|
| Waiter | Staff name as entered on each bill. Orders with no waiter name show as "—". |
| Orders | Total number of paid orders handled by this waiter. |
| Total Sales | Sum of all bill amounts for this waiter. |
| Avg Order | Average bill value (Total Sales ÷ Orders). |
💡 Tip: The same date range and payment type filters at the top of the Reports screen apply to the By Waiter tab — so you can see, for example, only UPI orders for last week by each waiter.
10. Users & Role Management
Control staff access with roles
Built-In Roles
| Role | Access Level | Typical Use |
|---|---|---|
| Owner / Admin | Full access to all screens including Settings, Reports, and User Management | Restaurant owner, manager |
| Cashier | POS billing and Tables only. Cannot view Reports or Settings. | Counter staff, waiter |
Creating a Custom Role
-
1
Go to Users → Roles → Add Role.
-
2
Enter a role name (e.g. "Floor Manager").
-
3
Check the permission boxes for each screen this role can access.
-
4
Click Save. The role is now available when adding users.
Adding a Staff Account
-
1
Go to Users → Add User.
-
2
Enter the staff member's full name, choose a username, set a password, and select their role.
-
3
Click Save. They can now log in with their credentials.
⚠️ Safety: System roles (Owner/Admin, Cashier) cannot be deleted. The Admin role always retains full access even if permissions are modified.
11. Keyboard Shortcuts
Speed up billing with keyboard controls
| Shortcut | Action |
|---|---|
| Ctrl + F | Focus the product search bar in POS |
| Enter | Add the top search result to the cart |
| Esc | Clear the search box / close a dialog |
| ↑ / ↓ | Navigate the search result list |
| Tab | Move to the next input field in forms |
💡 Power tip: During busy periods, keep your hands on the keyboard. Press Ctrl+F, type 3 letters of an item name, press Enter — faster than clicking the grid.
12. Frequently Asked Questions
Common questions and quick answers
Does CerebraQ work without internet? +
Where is my data stored? +
Can I use CerebraQ on multiple computers? +
How do I print bills? What printer is needed? +
I forgot the admin password. What do I do? +
Can I change prices after adding products? +
How do I handle GST exemptions for certain items? +
What happens to data after the 7-day trial ends? +
Do waiters need to install anything to use the mobile waiter app? +
The waiter app URL is not loading on the phone. What should I check? +
- The phone is on the same WiFi network as the counter PC (not mobile data).
- The CerebraQ desktop app is open and running on the counter PC.
- The URL in the browser matches exactly what is shown in the sidebar (including port :8080).
- Windows Firewall is not blocking port 8080 — if in doubt, temporarily disable the firewall and test again. Contact us for help adding the firewall rule permanently.
- Go to Settings → Waiter Mobile App and select the adapter that is on the same network as the phones.
Can a waiter add more items after sending the first Kitchen Order Ticket (KOT)? +
Still Have Questions?
Our support team replies within 24 hours. Reach us via email, phone, or WhatsApp.